Configure Contensis to use Azure AD
Log in to add to favouritesPage last updated 19 May 2025
With your Contensis application registered in Azure AD, the next step is to login to Contensis and configure the Azure AD integration.
- Login to Contensis using an administrative account.
- Navigate to the Management Console and select Global Settings, you need to enter the following settings:
WSFederation_MetadataEndpoint
This needs to be set to your Azure AD metadata endpoint address. This can be found by following these steps:
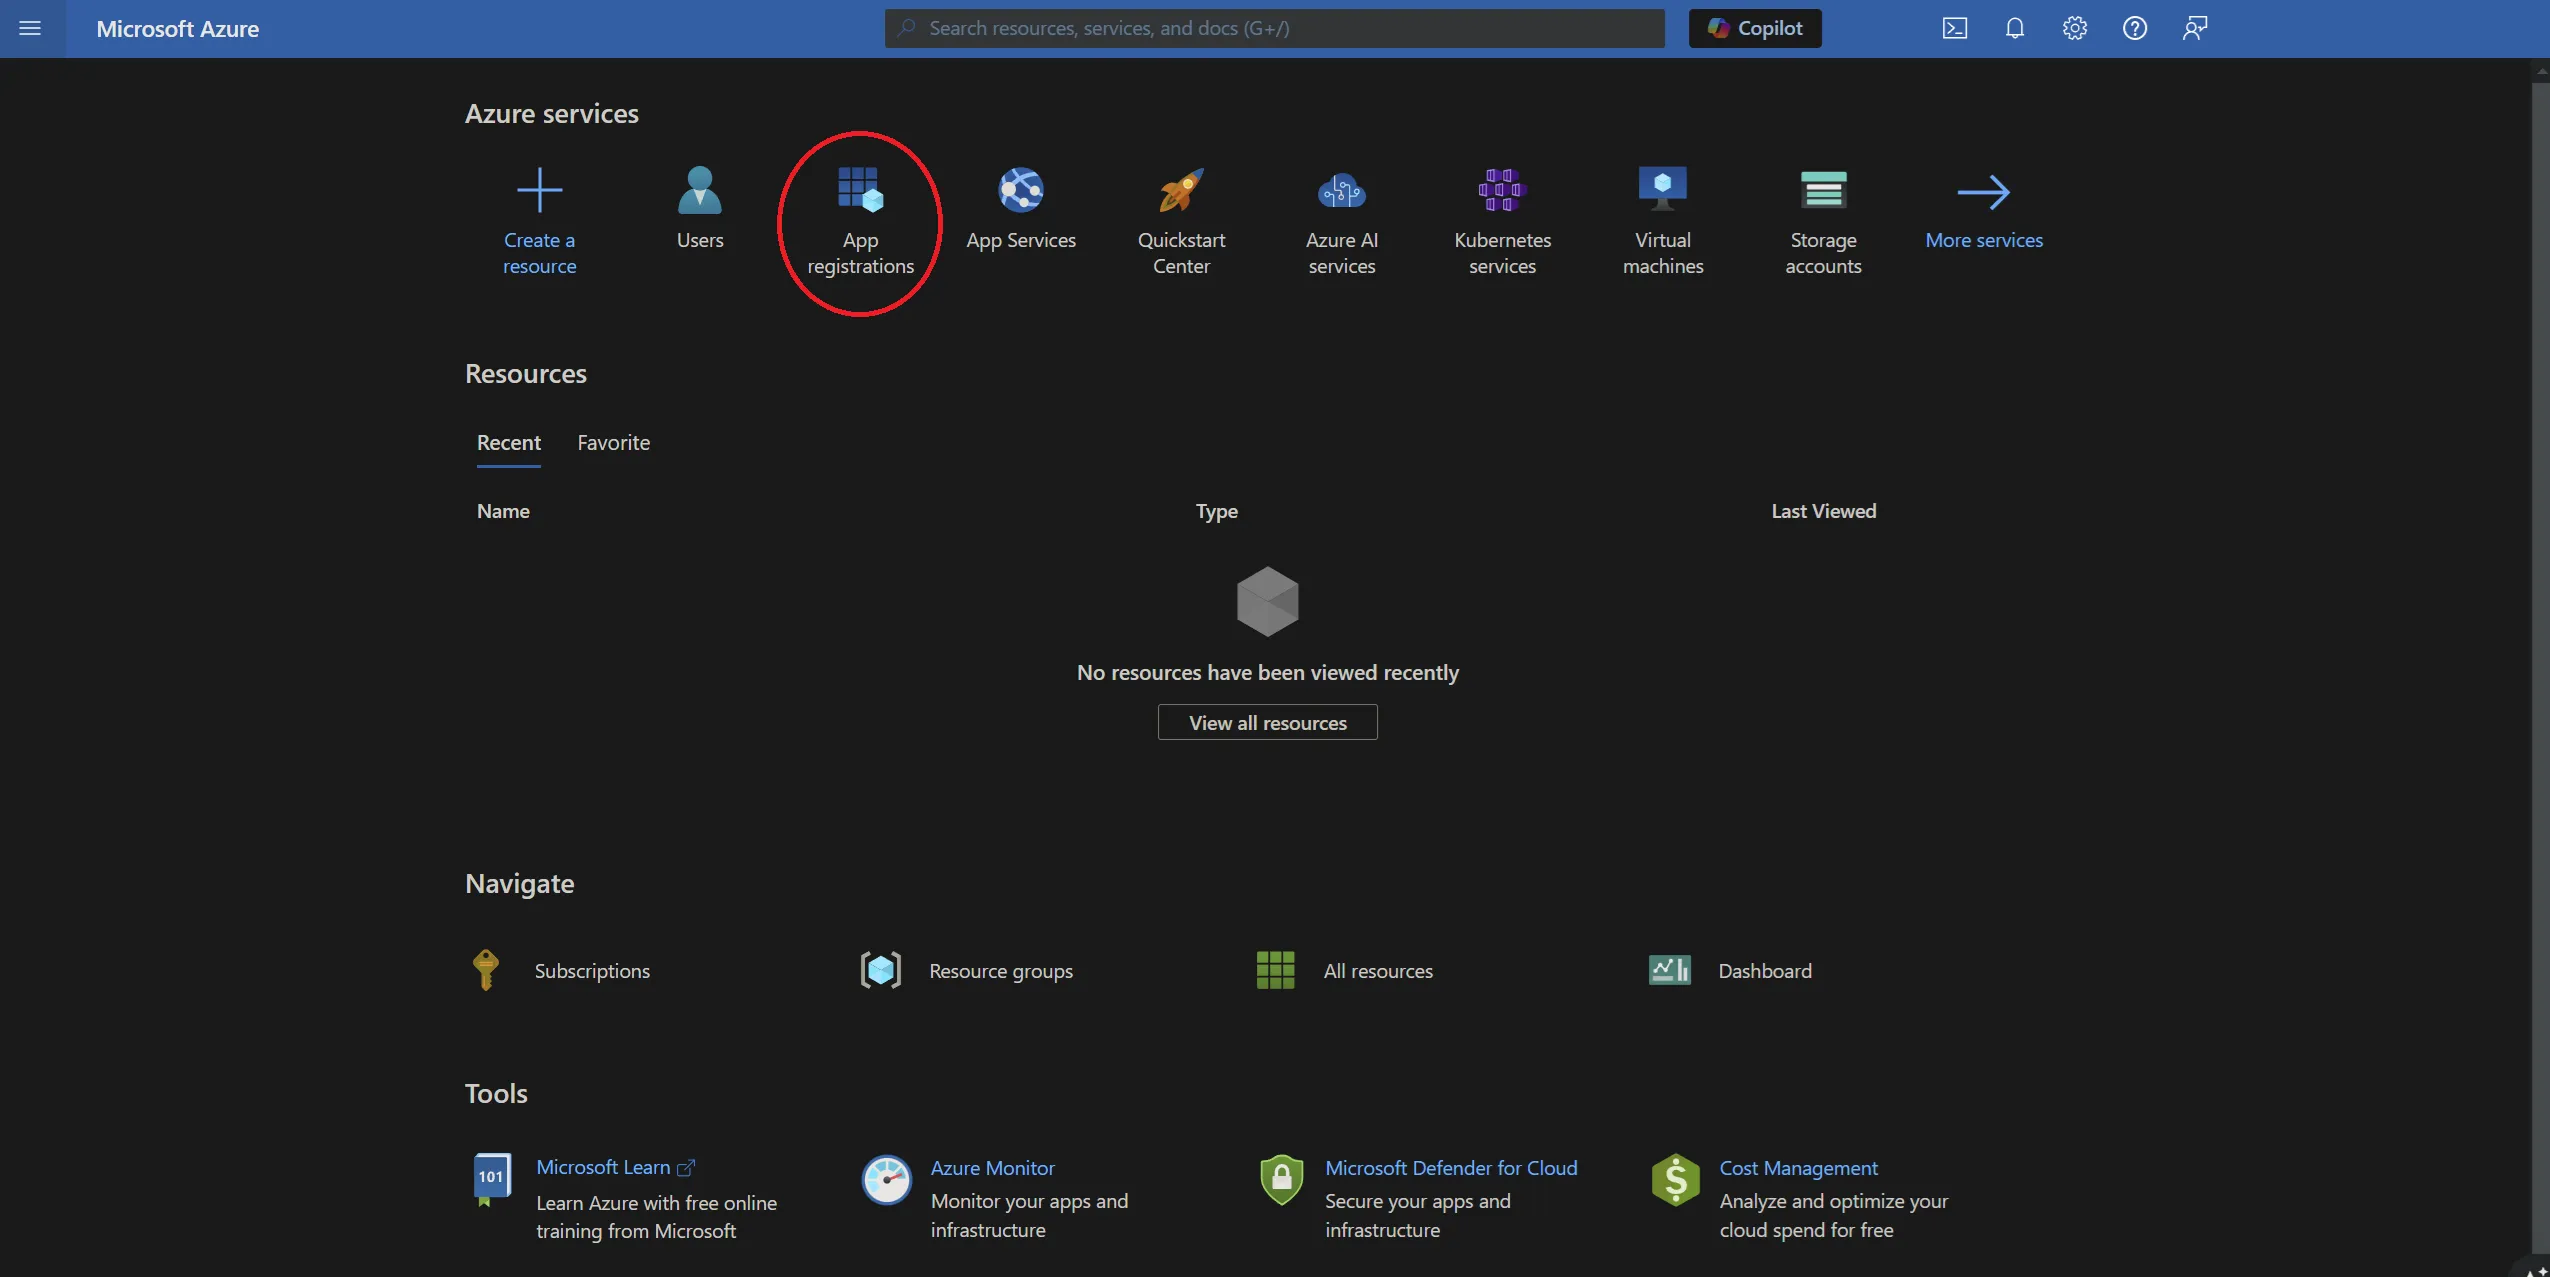
- Navigate to the Azure Portal home page, followed by App Registrations:
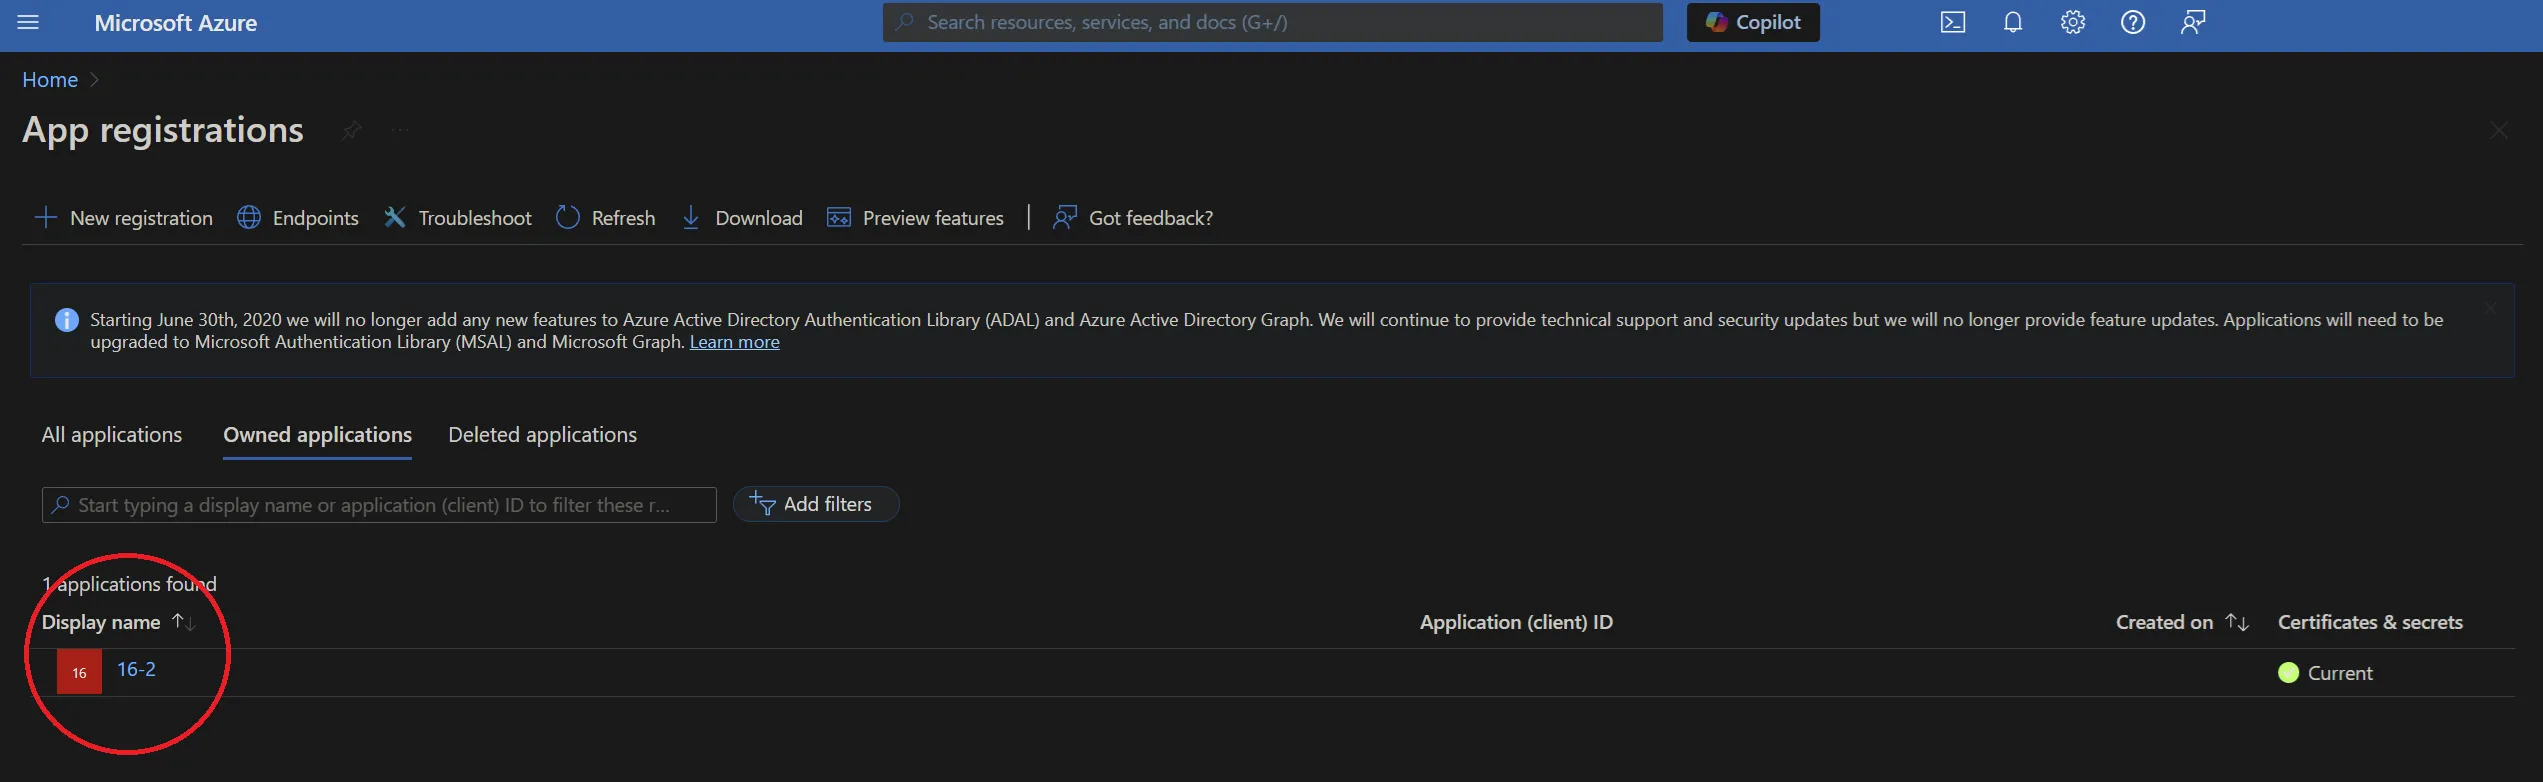
- Next, select the relevant application from the list:
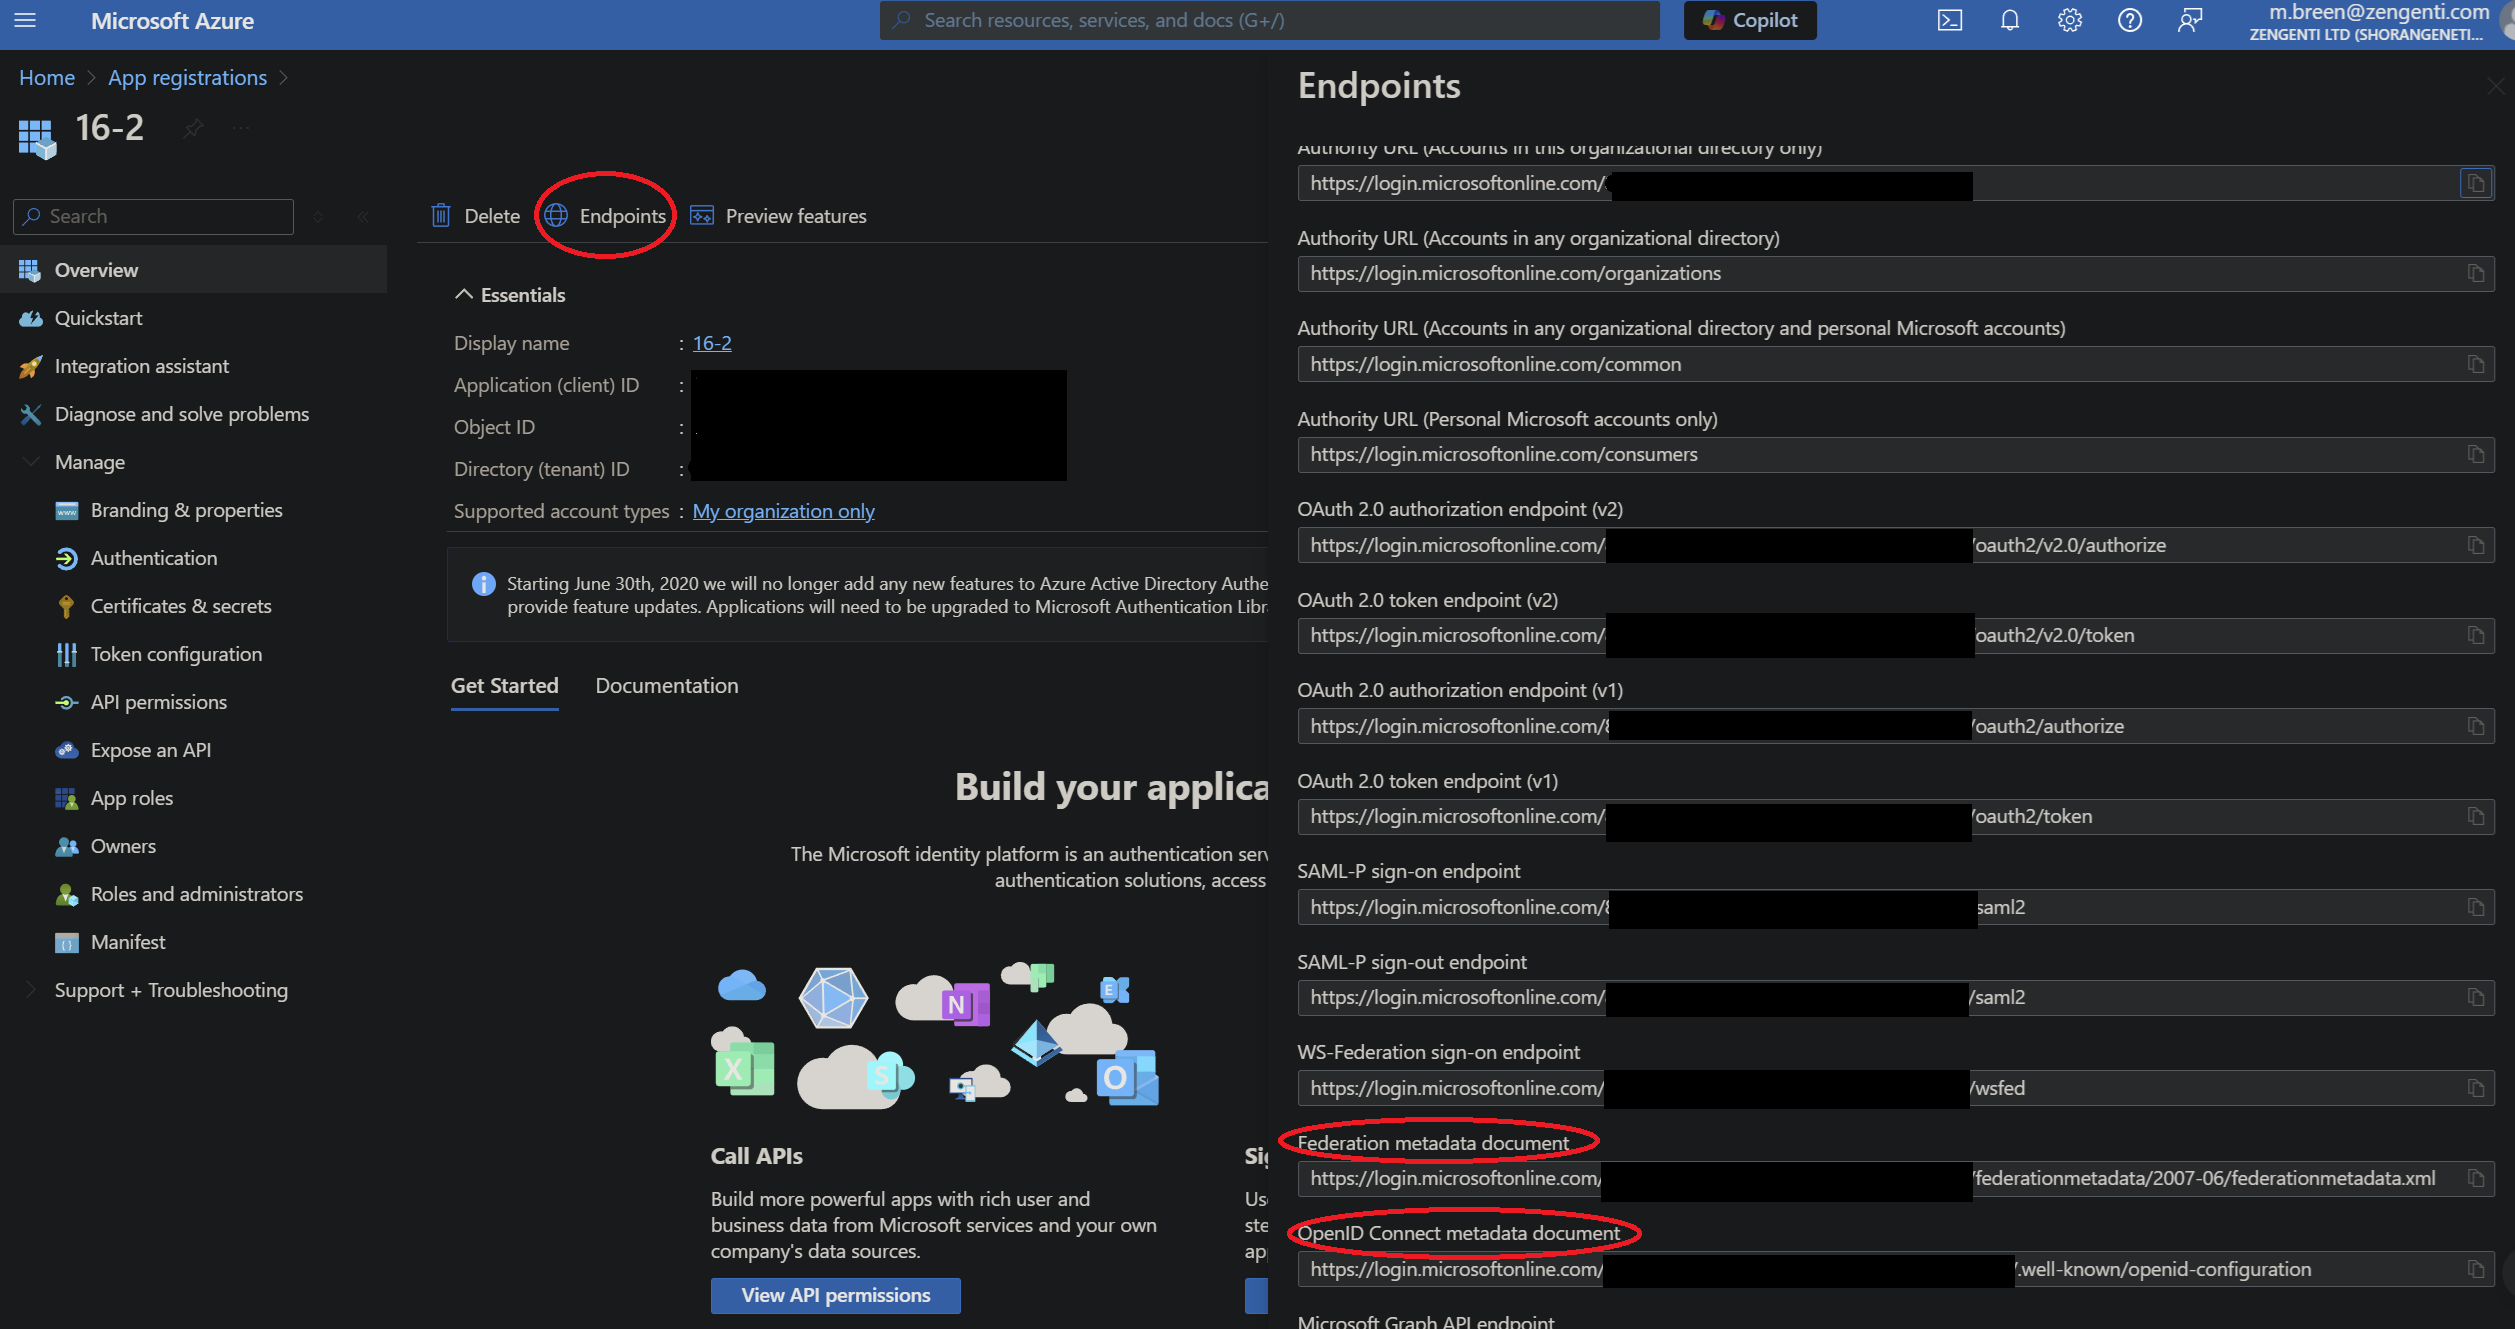
- Update the WSFederation_MetadataEndpoint global setting. The value for this is different depending on whether you are using the current Azure AD configuration (WSFederation_Type=3) or the legacy configuration (WSFederation_Type =2):
- Legacy Azure AD configuration (WSFederation_Type =2): Copy the Federation Metadata Document address from the textbox.
- Current Azure AD configuration (WSFederation_Type =3): Copy the OpenID Connect metadata document address from the textbox
WsFederation_AzureTenantID
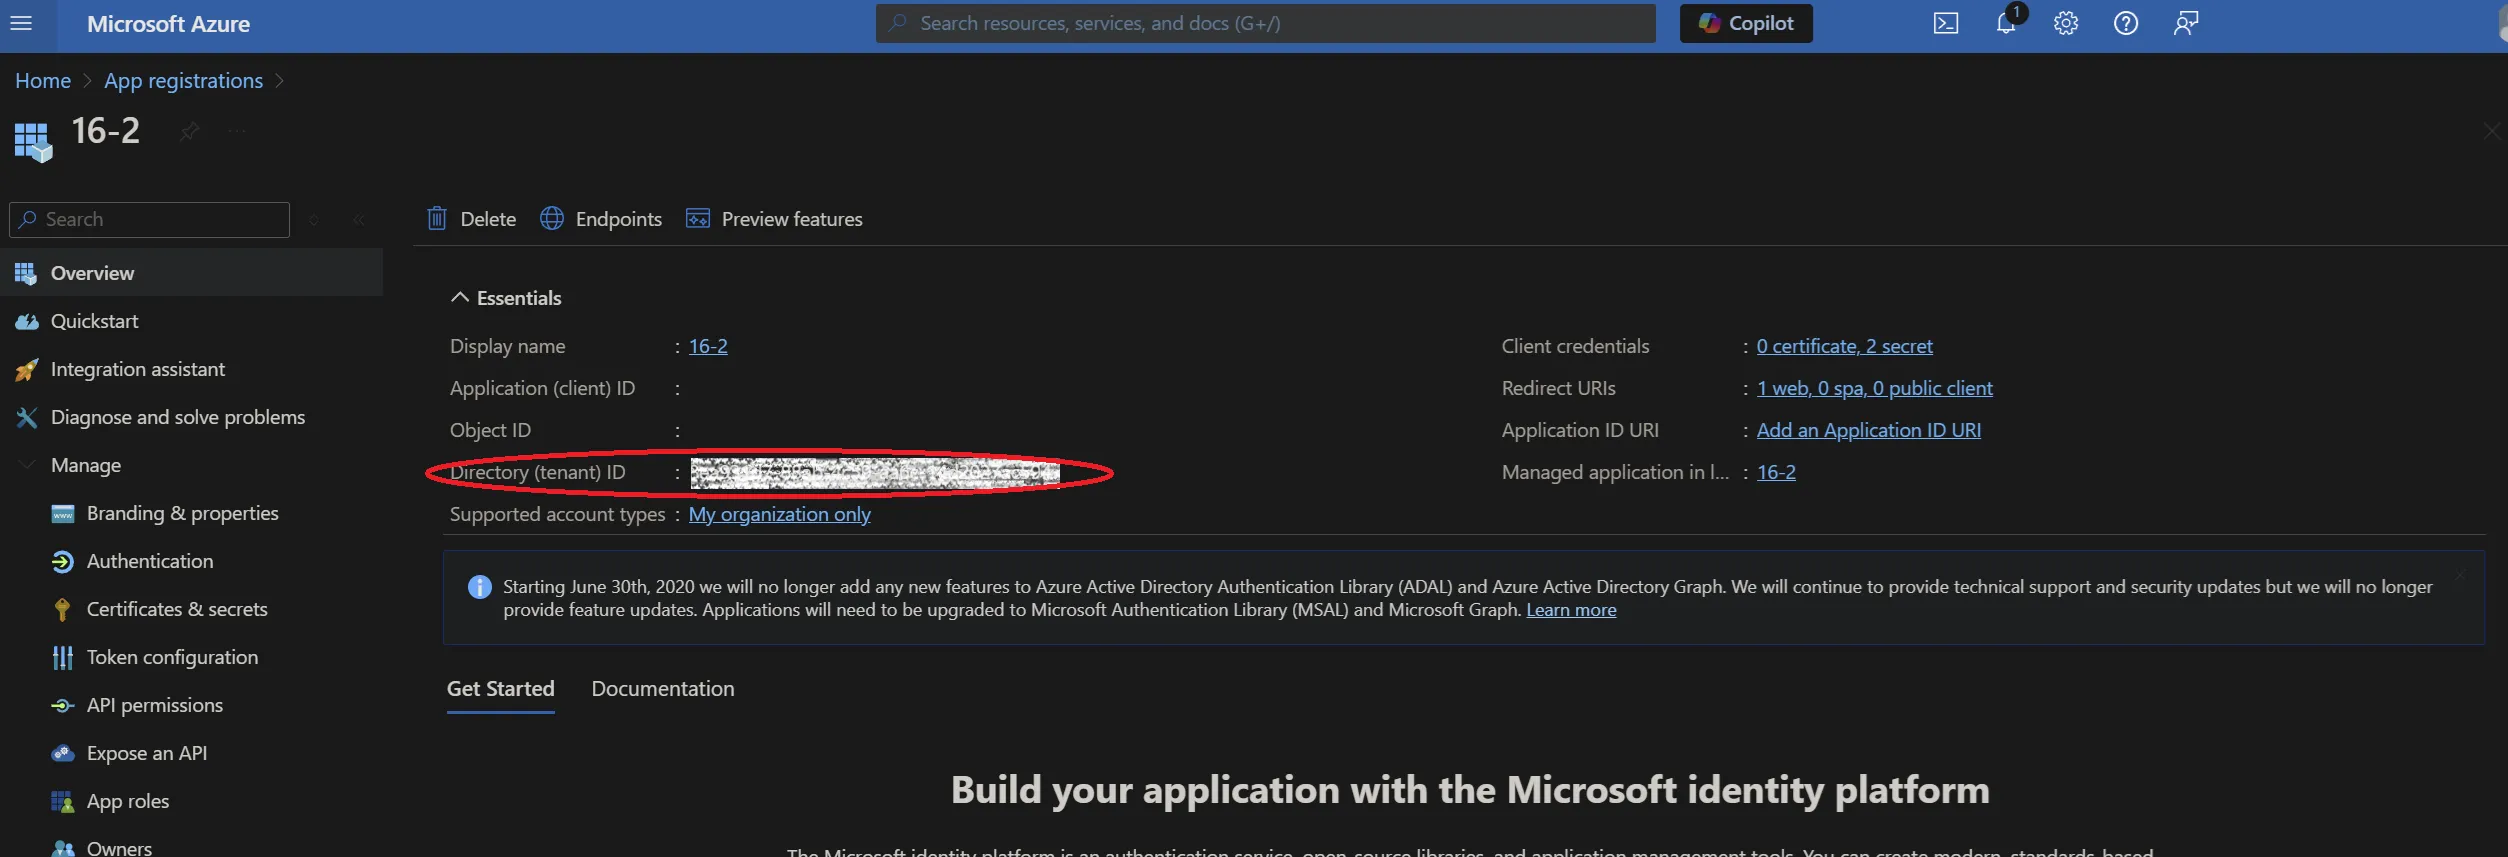
This needs to be set to your Azure AD tenant ID. This can be found by following these steps:
- Select Azure Active Directory, followed by Properties. Your tenant ID is the same as your Directory ID. Enter this in the WSFederation_TenantID global setting.
WsFederation_AzureTenantName
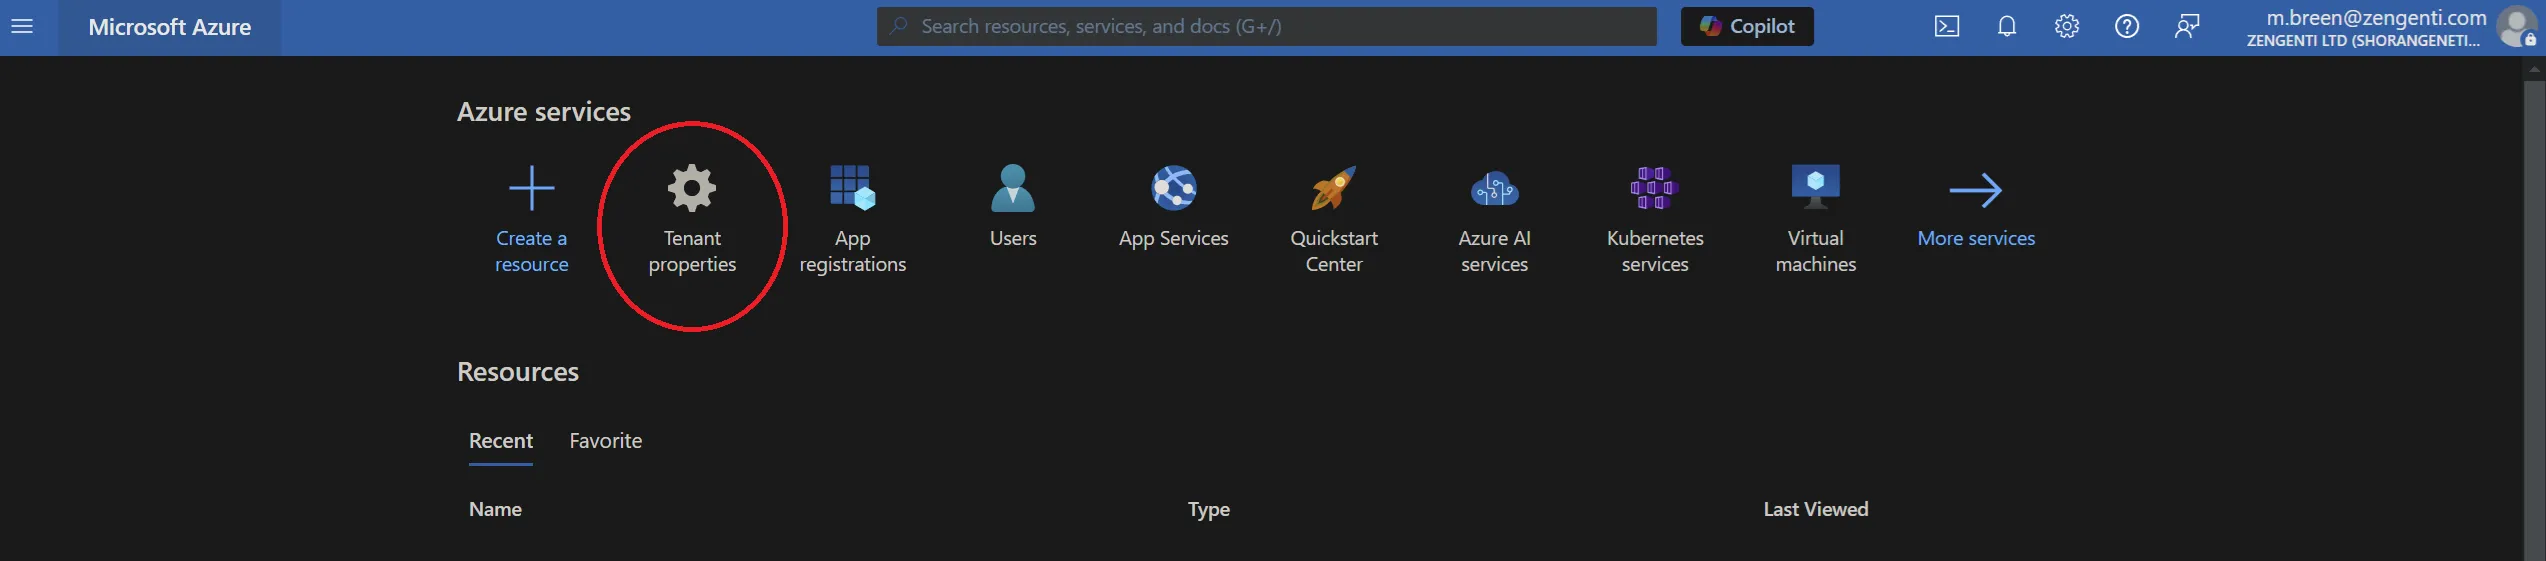
This needs to be set to your Azure AD tenant name. This can be found by following these steps:
- Go to the Azure Portal home page and select 'tenant properties'. Your tenant name is the name of your primary domain. Enter this in the WSFederation_TenantName global setting.

WsFederation_AzureApplicationID
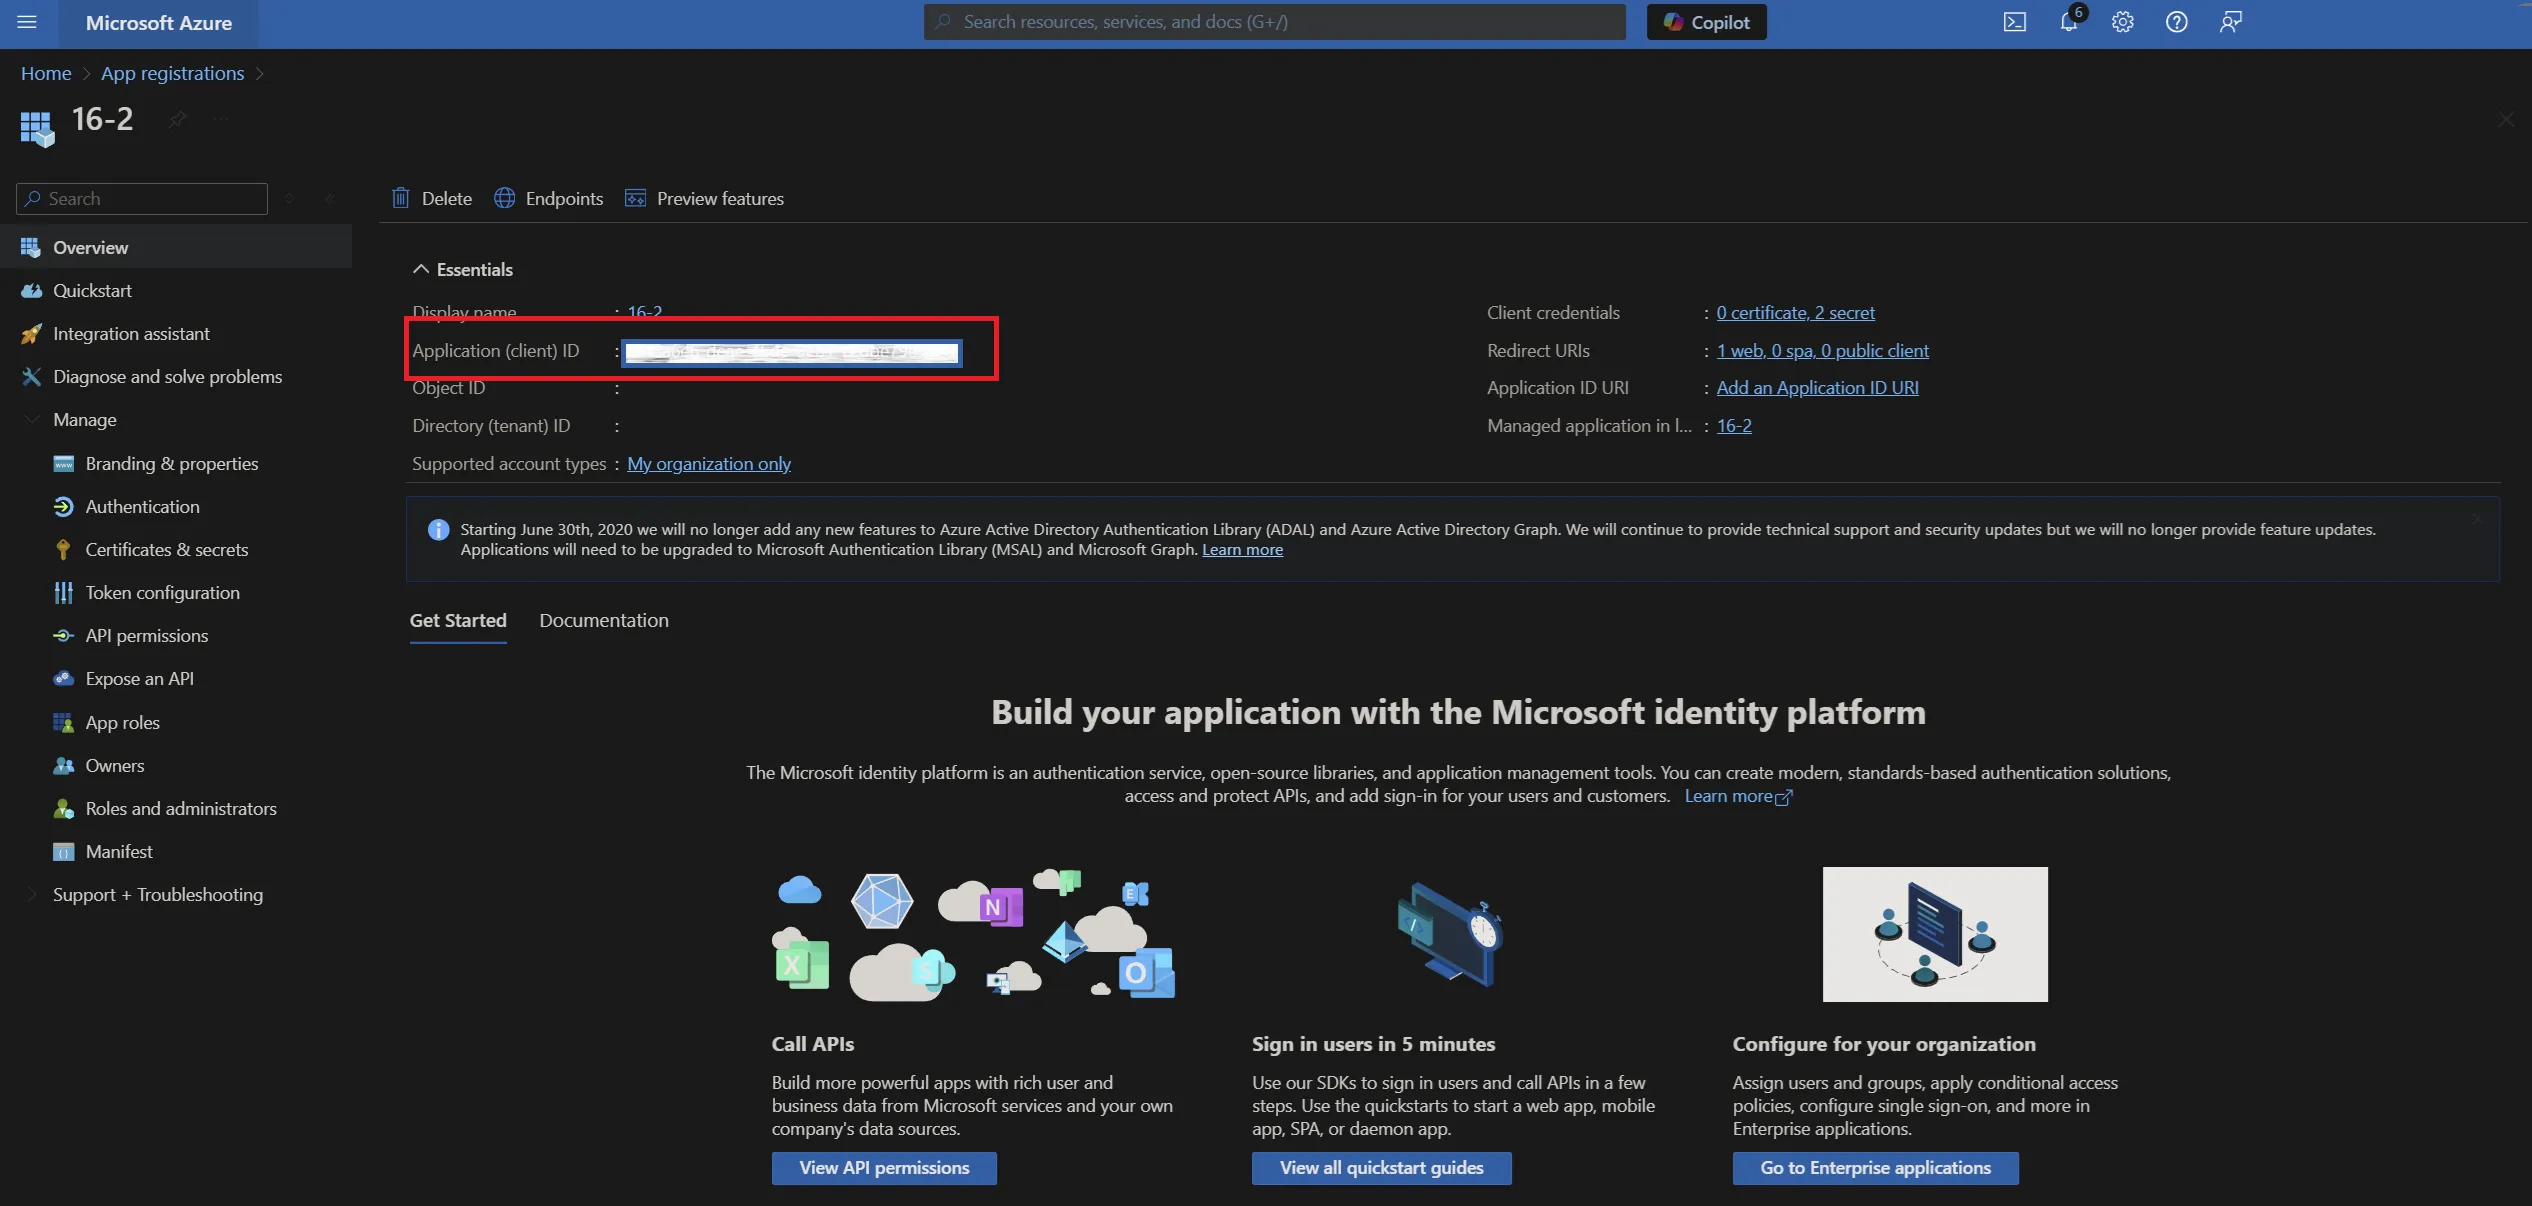
This needs to be set to the application ID of the registered Contensis app in Azure. This can be found by following these steps:
- Navigate to the Azure Portal home page, followed by App registrations then select the Contensis application. Your application ID is listed on the application overview. Enter this in the WSFederation_ApplicationID global setting.
WsFederation_AzureApplicationKey
- Navigate to your application and click Certificates & secrets and then select '+ New client secret'.
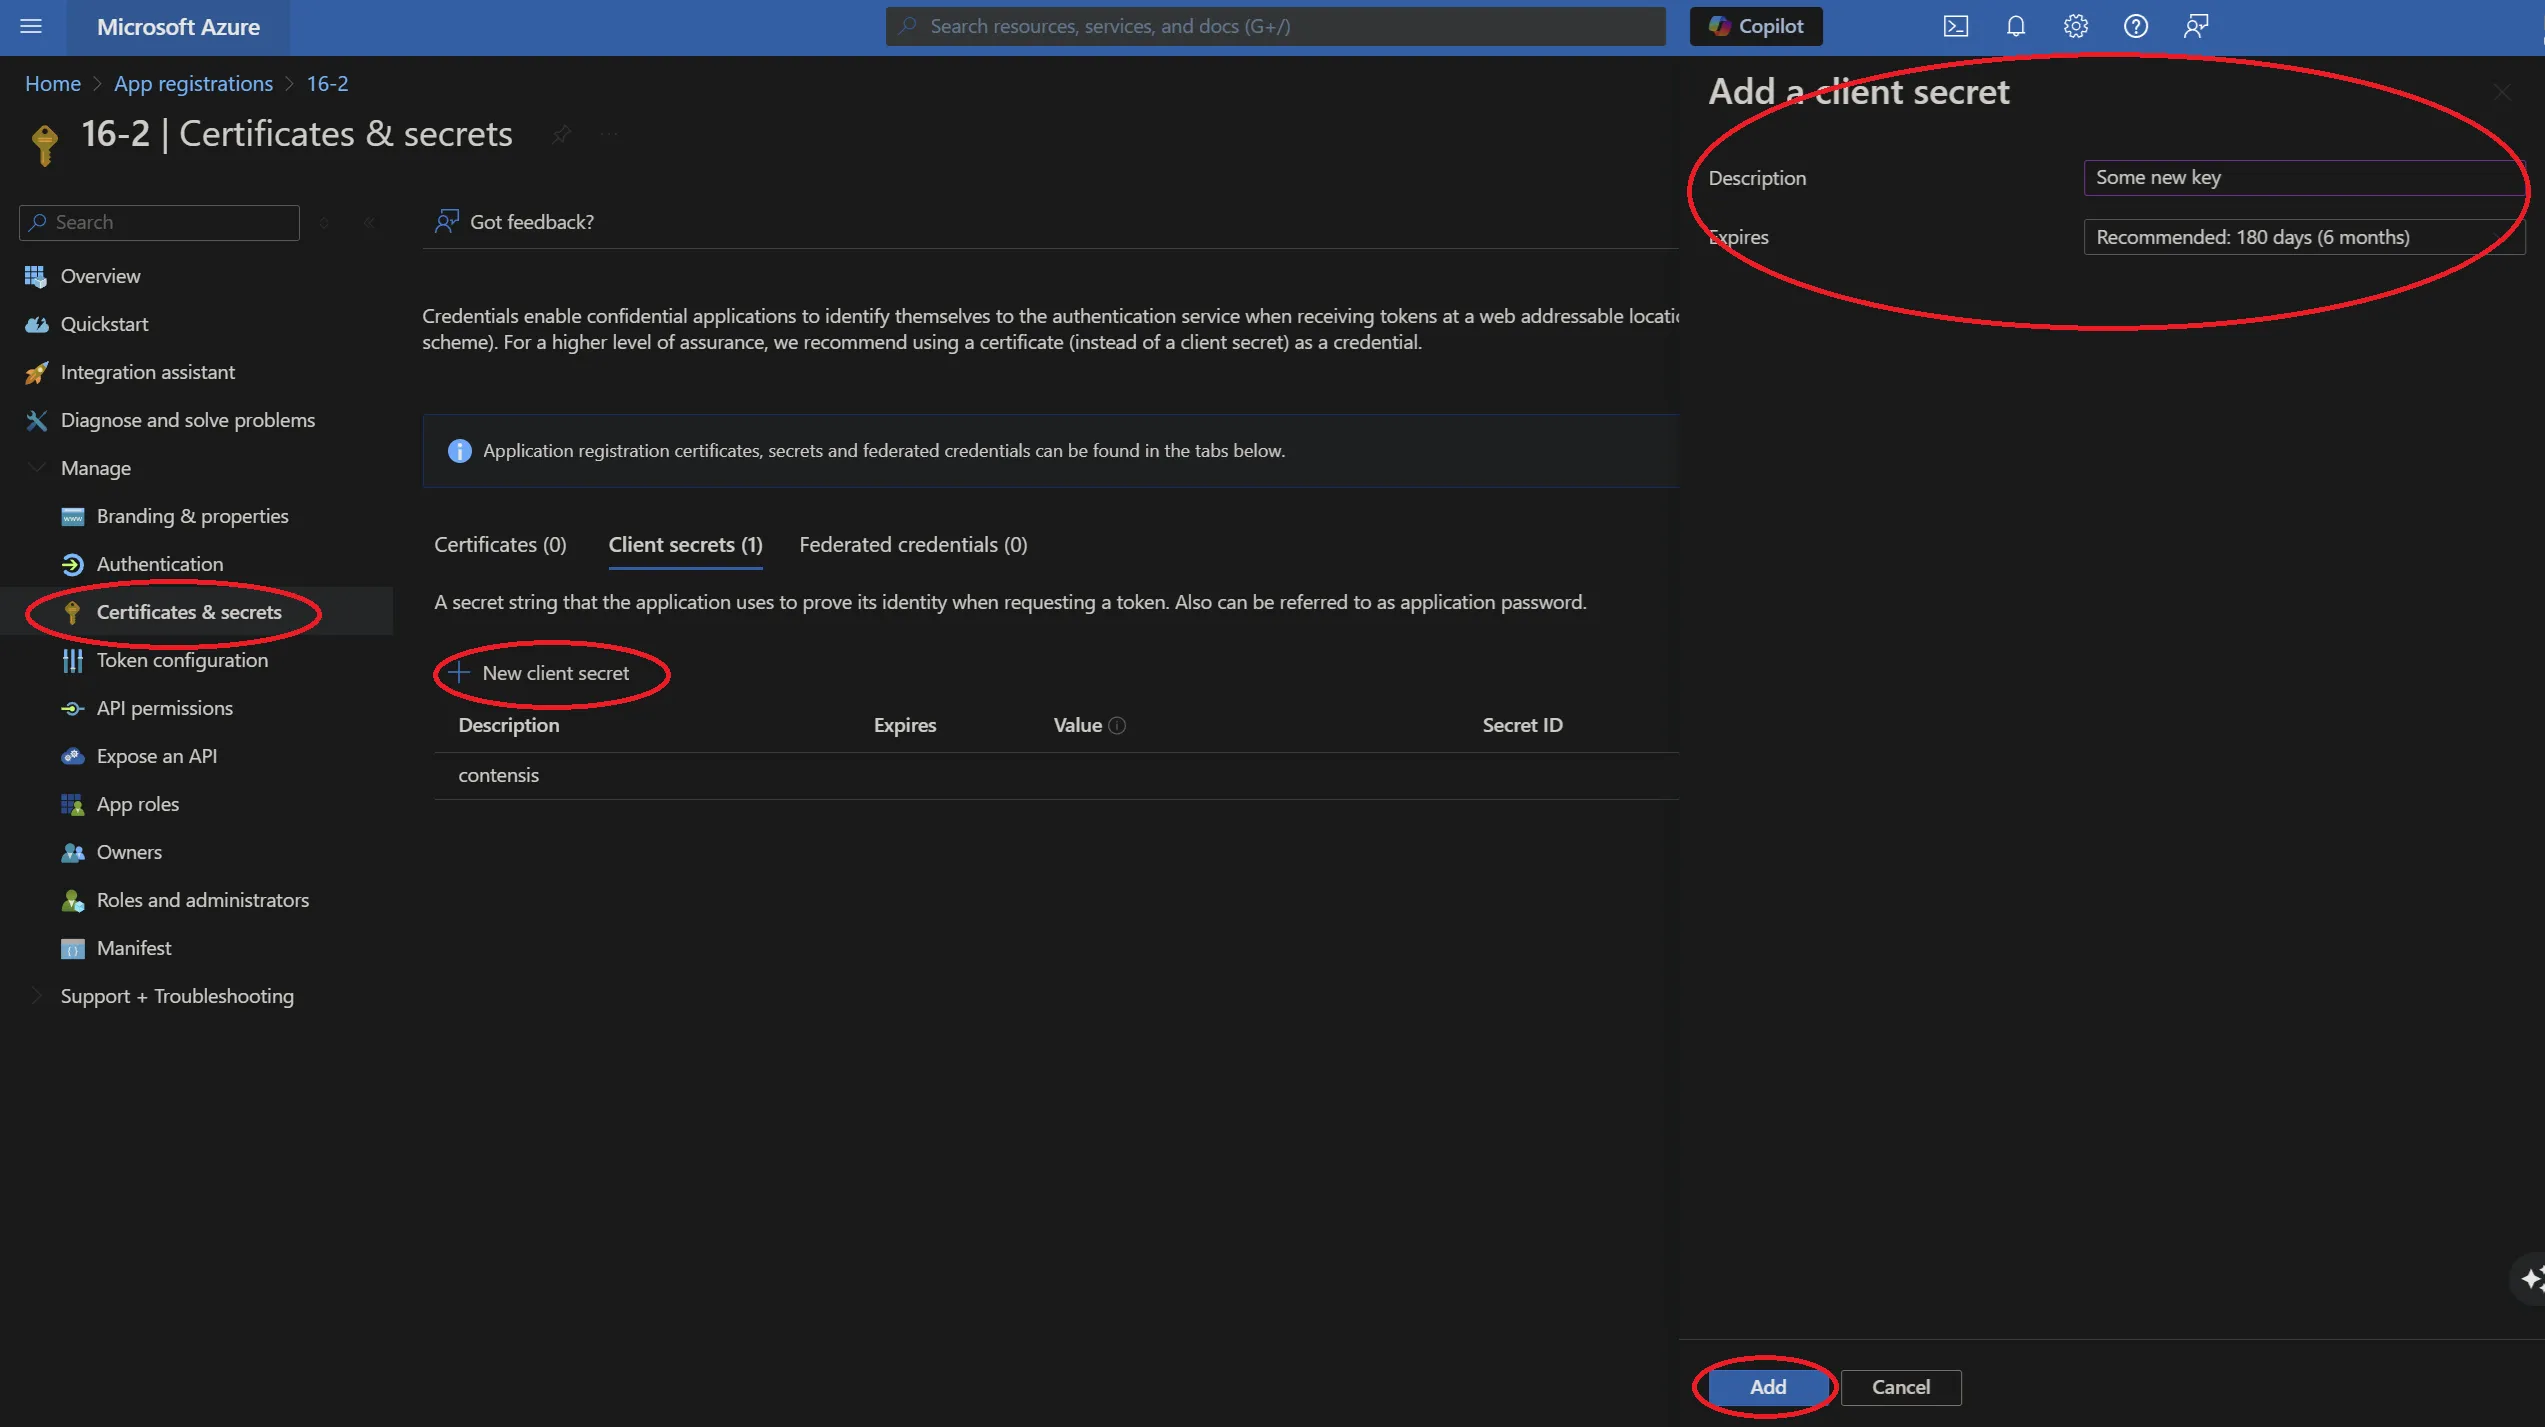
- Enter a description, choose an expiration and then click Add.
Note: Once you navigate away from this screen you will not be able to retrieve the key again. In the event that you lose the key value then you will need to delete the key and add a new one.
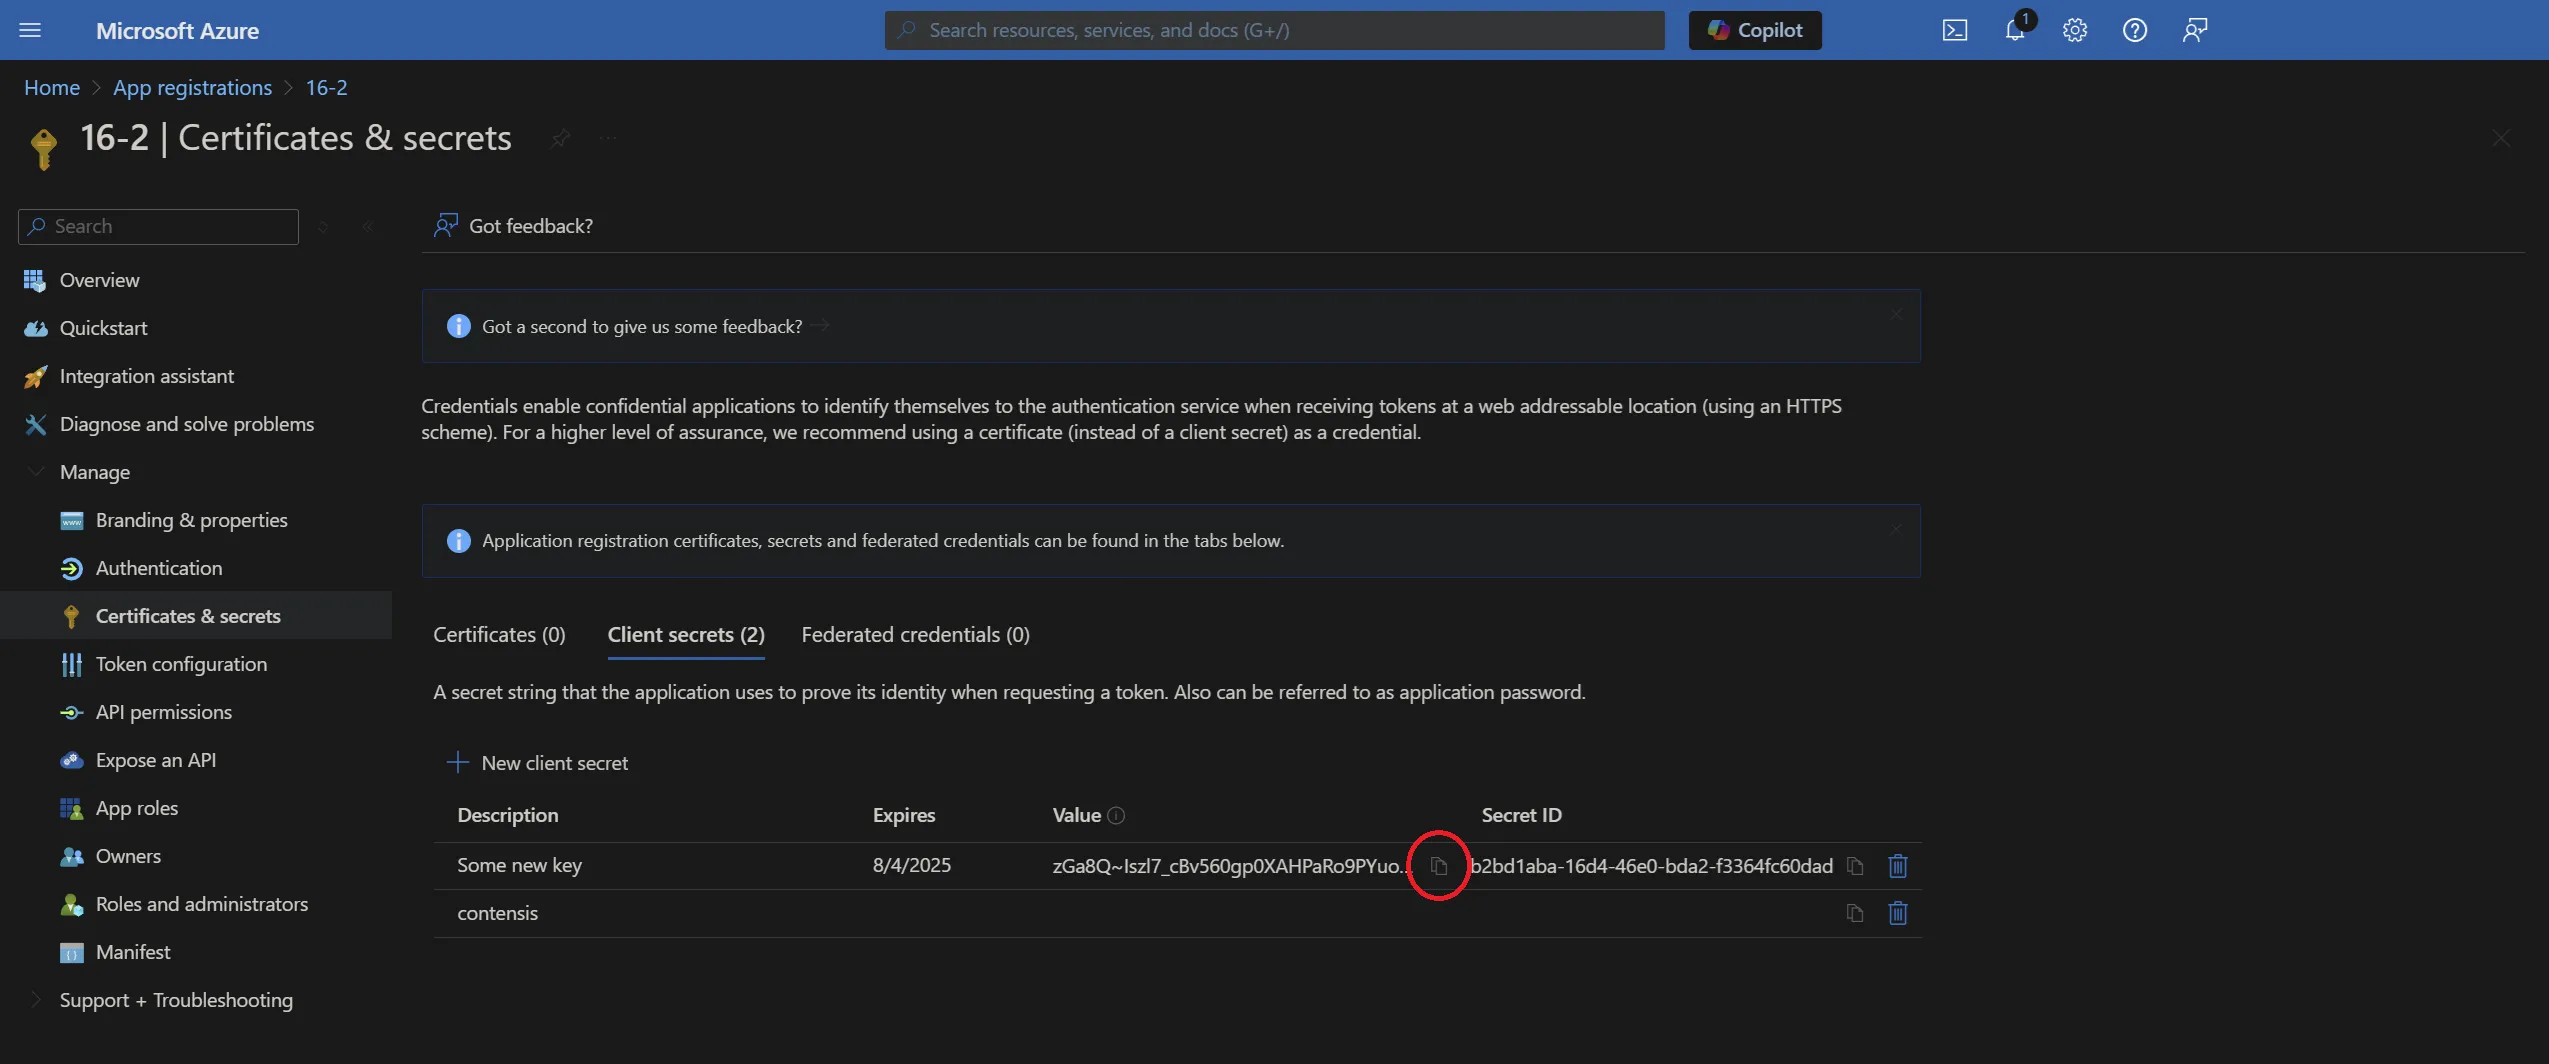
- Enter the value of the key into the WSFederation global setting.
WSFederation_Type
This needs to be set to 2 for Azure AD accounts created before October 2021, and to 3 for any created later.
Optional Global Settings
WsFederation_Azure_PrioritiseUPNForEmailAddress
If set to 1, the UPN of a user will be checked first when establishing the user's email address instead of the primary email claim.
WsFederation_EnableGroupImports
If set to 1, a successful federated CMS login will configure the relevant user's groups to match those on the federated identity provider. If set to 0, no group changes will take place on login. NB: The CMS must be restarted for this to take effect.
WsFederation_AzureAdGroupImportAllowList
Specifies the groups from the federated identity provider that are permitted to be imported during login. Use a semicolon-separated list of group names. If left empty, all groups will be imported (when WsFederation_EnableGroupImports is active). CMS restart required for changes to take effect.
NB: This setting can be changed without having to restart the identity provider (IdP)
Final step
Our support team will need to apply these changes for you. Please raise a help desk ticket to arrange this.