Deploying a Express.js site
Log in to add to favouritesPage last updated 21 May 2024
✔️ Prerequisites
-
VS Code (or another IDE)
-
Node.js to check if you have Node.js installed, run this command in your terminal:
node -v -
NPM to check if you have NPM installed, run this command in your terminal:
npm -v -
Git (optional) to check if you have Git installed, run this command in your terminal:
git --version - GitHub account (New to GitHub? Sign up here)
What is a Contensis Block?
A Block is a package of code built as a Docker image, that runs on our cloud infrastructure, allowing your site owners to deploy and manage your code from the Contensis interface.
Each Block contains your application or service and all the dependencies required to run it. Not only does this let you develop in any language, but it also means that your code will work the same way in your production environment as it does when you are developing locally.
You can easily package and deploy code to Contensis as Blocks without leaving your IDE. There's no need to understand Kubernetes, container orchestration, or how to manage environments across multiple data centres – Contensis handles that for you.
Install the Contensis CLI 🤖
Before we start we need to install the Contensis CLI. The Contensis CLI is a tool that provides a command-line interface for developers working with a Contensis CMS. It offers commands to perform various tasks related to content management, deployment, and configuration within Contensis, all from the terminal (or command prompt for Windows). We need the Contensis CLI as it makes it easier to automate tasks or integrate Contensis with other tools and processes. In this example, we will be using the Contensis CLI to set up a Contensis Block.
Installing the Contensis CLI can depend on whether you're using a Mac or a Windows machine, follow the appropriate steps for your setup below.
Windows
Instal Contensis CLI on Windows using Choco
choco install contensis-cli --pre
Mac / Linux
Install Contensis CLI on Mac using Brew
brew tap contensis/cli
brew install contensis-cli
Fork the Leif Express example 🍴
- Log into your GitHub account.
- Go to https://github.com/contensis/express-leif-example and fork the repo
- Next, we ned to enable GitHub workflow actions. If you're unsure about how to do this, don't worry, follow this GitHub guide; we'll explore the reasons behind this step later in the article.
Cloning the repo 🤝
- Firstly open up a terminal and
cdinto your local development folder - Next we want to clone the repository using SSH with the following command:
git clone git@github.com:{github-username}/express-leif-example.gitIf you haven't set up SSH keys for your GitHub account, you can use HTTPS instead of SSH to clone repositories. Follow these steps to configure Git to use HTTPS:
- Open Terminal or Command Prompt: Depending on your operating system, open Terminal (on macOS and Linux) or Command Prompt (on Windows).
- Configure Git with Your GitHub Credentials:
git config --global user.name "Your GitHub Username"
git config --global user.email "your.email@example.com"
Clone the Repository Using HTTPS:
git clone https://github.com/{github-username}/express-leif-example.gitNavigate to the project directory
cd express-leif-exampleUsing your favourite IDE 🤩
- Open Your IDE: Launch your preferred integrated development environment (IDE)
- Go to File Menu: Once your IDE is open, locate and click on the "File".
- Open Folder or Project: From the File menu, you'll find an option named "Open Folder" or "Open Project," depending on your IDE. Click on this option.
- Navigate to the Desired Folder: Find and select the folder you want to open in your IDE.
Please note that the exact labels and menu options might vary slightly based on your specific IDE.
What are GitHub actions? 🤔
💡 GitHub Actions are a powerful automation and workflow tool provided by GitHub. It allows you to automate your software development workflows directly within your GitHub repository. With GitHub Actions, you can define custom workflows to build, test, package, release, or deploy your code, among other tasks. These workflows are defined in YAML files and can be triggered by various events, such as pushes, pull requests, or scheduled events.
In this example, we will be using GitHub actions. We've already included a workflow file in your forked repository. To see your workflow file, go to .github/workflows/build.yml.
CLI Setup 🛠️
- Check Contensis CLI Installation:
Ensure you have Contensis CLI installed and it's the latest version. Open your terminal and run:
You can check the Contensis CLI latest version here
contensis -V2. Run the Contensis CLI
contensis3. Connect to Your CMS:
Replace {alias} with your CMS alias. Determine your {alias} by examining your CMS URL, for instance, cms-leif.cloud.contensis.com. Extract the part that follows 'cms-'. In this example, the {alias} would be 'leif' e.g connect leif.
connect {alias}4. Log into your Contensis account
Replace {username} with your username, then enter your password when prompted
Your login credentials will be the same as your CMS credentials.
login {username}5. Make sure you are connected to the correct project. You can change project by typing the following command, replacing {project} with the project you'd like to connect to
set project {project}6. Initialise Development:
Now, it's time to set up your development environment. Run the following command to kickstart the process. This command will guide you through a series of questions, just follow the prompts and watch the magic happen behind the scenes:
dev init7. Review and Commit Changes:
Open your IDE's Source Control to review the changes. Once satisfied, commit the changes. You can also commit using the terminal:
8. Push Changes to Git:
Push your changes to Git, either in your IDE or using the terminal:
git add .
git commit -m 'getting started with blocks'
git push
9. Check build status & verify API Keys and Roles
- Verify the success of your push by checking the build in your recently forked repository.
- Go to your CMS and check your API Keys and Roles. Contensis CLI automatically creates the required keys for you and assigns them to the Role.
Making a change 🔄
- Firstly we want to make sure we are in the correct directory
- Next we can install the project dependences using the following command:
npm install3. Run the app locally on your machine
Once you have installed the dependencies, you can run the Leif app locally on your machine using the following command:
npm startTask: Change the background colour 🖍️
1. Locate the CSS file:
Open the project folder and find the CSS file named site.css, this file contains all the styles for this Express app.
2. Identify the Background Property:
Within the CSS file, look for a rule that sets the background property. It might look like this:
body {
    background-color: #ffffff;
}
3. Change the colour code:
Let's modify the background-color property value from #ffffff to #ddf8ce, an off-green colour.
Your code should now look something like this:
body {
    background-color: #ddf8ce; /* Change this colour code */
}
Preview the change locally 👁️
Once we've made the change we can preview this locally.
Release the block 🚀
Preview and Edit:
Preview your changes, and if happy with them, proceed to the next step.
Push Changes:
Use the git command git add . to add files to staging and then git commit -m "background colour change" to commit your changes to your forked repo, then push the changes using the git command: git push. After committing these, you can watch the build process by heading over to the forked repository
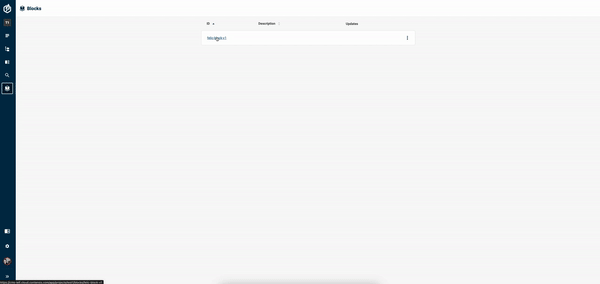
Go to the CMS and navigate to the Blocks screen:
Please see the screenshot below if you're unsure.
Click the Block with the ID you gave it, then click on the preview button to review your changes.
Release the Block:
Head back to the Blocks screen, and click on the kebab menu. Select "Release" and then choose to make the Block live by clicking "Make live".
Awesome! You have successfully made a Block live 🥳