Getting started with Contensis using the JavaScript Management API
Log in to add to favouritesPage last updated 10 December 2024
The Contensis Management API allows you to import and manage content within content types and entries. This guide will walk you through the process of creating and publishing entries using a simple Node.js app. We'll cover setting up your environment, making API requests, and publishing data using the JavaScript Management API.
✔️ Prerequisites
Before you begin, make sure you have the following:
- A basic understanding of JavaScript
- Node.js
- npm, which should be installed automically when you install Node.js
- Basic command line interface knowledge
Setting up your environment 🌳
First, let's create a new folder for our project, and navigate into it using the command line.
Depending on your operating system, open Terminal (on macOS and Linux) or Command Prompt (on Windows), and enter the following commands:
mkdir contensis-js-management-api-project
cd contensis-js-management-api-project
Now run the following command to initialise a new Node.js project inside the folder:
npm init -ySetting up the client 🧰
- To set up the client we need to install the Contensis JavaScript Management API package. Use the following command to install the package:
npm i contensis-management-api- Additionally, let's add the dotenv package into our application. Using
dotenvallows us to seamlessly integrate our environment variables into our codebase using the intuitive syntaxprocess.env. Enter the command below to installdotenvwith npm:
npm i dotenv- Now that we've installed the Contensis Management API, we can set up our client. Create a new file called
index.jsand paste the following code snippet inside it:
import { Client } from 'contensis-management-api';

const client = Client.create({
  clientType: "client_credentials",
  clientDetails: {
    clientId: process.env.CLIENT_ID,
    clientSecret: process.env.CLIENT_SECRET
  },
  projectId: process.env.PROJECT_API_ID,
  rootUrl: `https://cms-${process.env.ALIAS}.cloud.contensis.com`
});
Creating our API key 🔑
In the previous snippet, you might have noticed that we are retrieving environment variables from our .env file. Let's go through the setup process step by step:
- Create a .env file:
- Start by creating a .env file in the root directory of your project.
- Access CMS API Keys:
- Navigate to your CMS and go to
Settings > API keys.
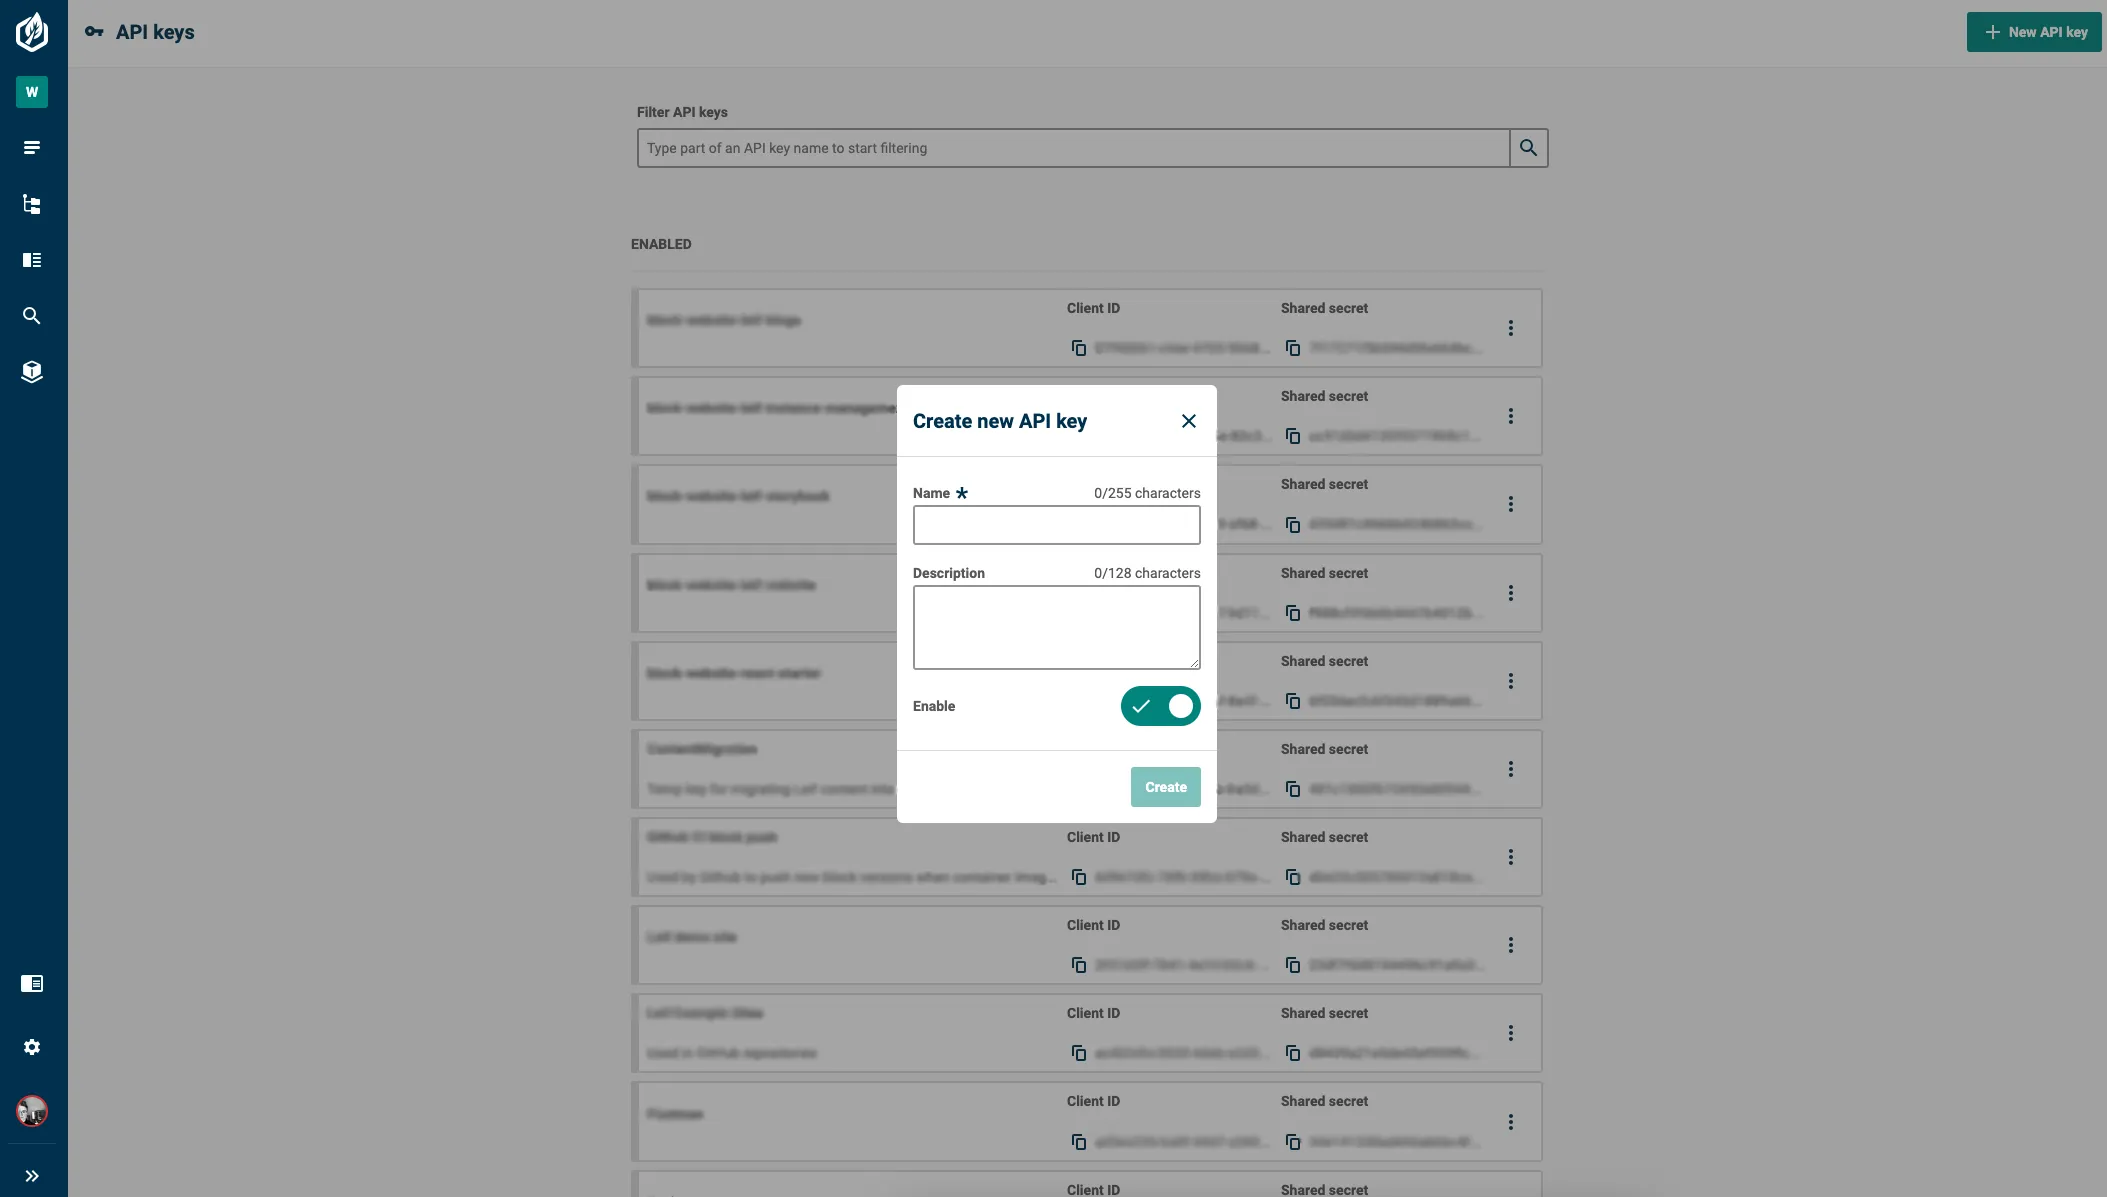
- Create a New API Key:
- Create a new API key with a descriptive name. Remember to jot down the key; you'll need it later.
- Update
.envFile:
- Copy the client ID and client secret provided by the CMS. Store them in your
envfile like this:
CLIENT_ID=
CLIENT=SECRET=
Remember you save the file after making these updates.
In the previous snippet, you might have noticed that we are retrieving environment variables from our .env file. Let's go through the process of configuring our .env file step by step:
- Start by creating an empty
.envfile in the root directory of your project. - Our .env will store the Client ID and Client Secret for the API key we'll use to access our Contensis environment, but first we need to create a new API key. Create an account with Contensis or log in.
- Navigate to your account dashboard and launch your free trial environment. (If you don't have a free trial, you can request one by contacting us here).
- Go to Settings > API Keys in your Contensis project.
- Press the New API Key button in the top-right corner to create a new API key. Give it a descriptive name and remember to jot down the key – you'll need it later.
- We now need to update the
.envfile with the credentials for our API key. Copy the client ID and client secret provided by the CMS. Store them in your.envfile like this:
CLIENT_ID= {your client ID}

CLIENT_SECRET= {your shared secret}
Configuring your PROJECT_API_ID and ALIAS ⚙️
To keep things secure and flexible, we need to put our variables in the .env file. Storing them in the .env file improves security and makes it simpler to tweak them without dealing with the crux codebase.
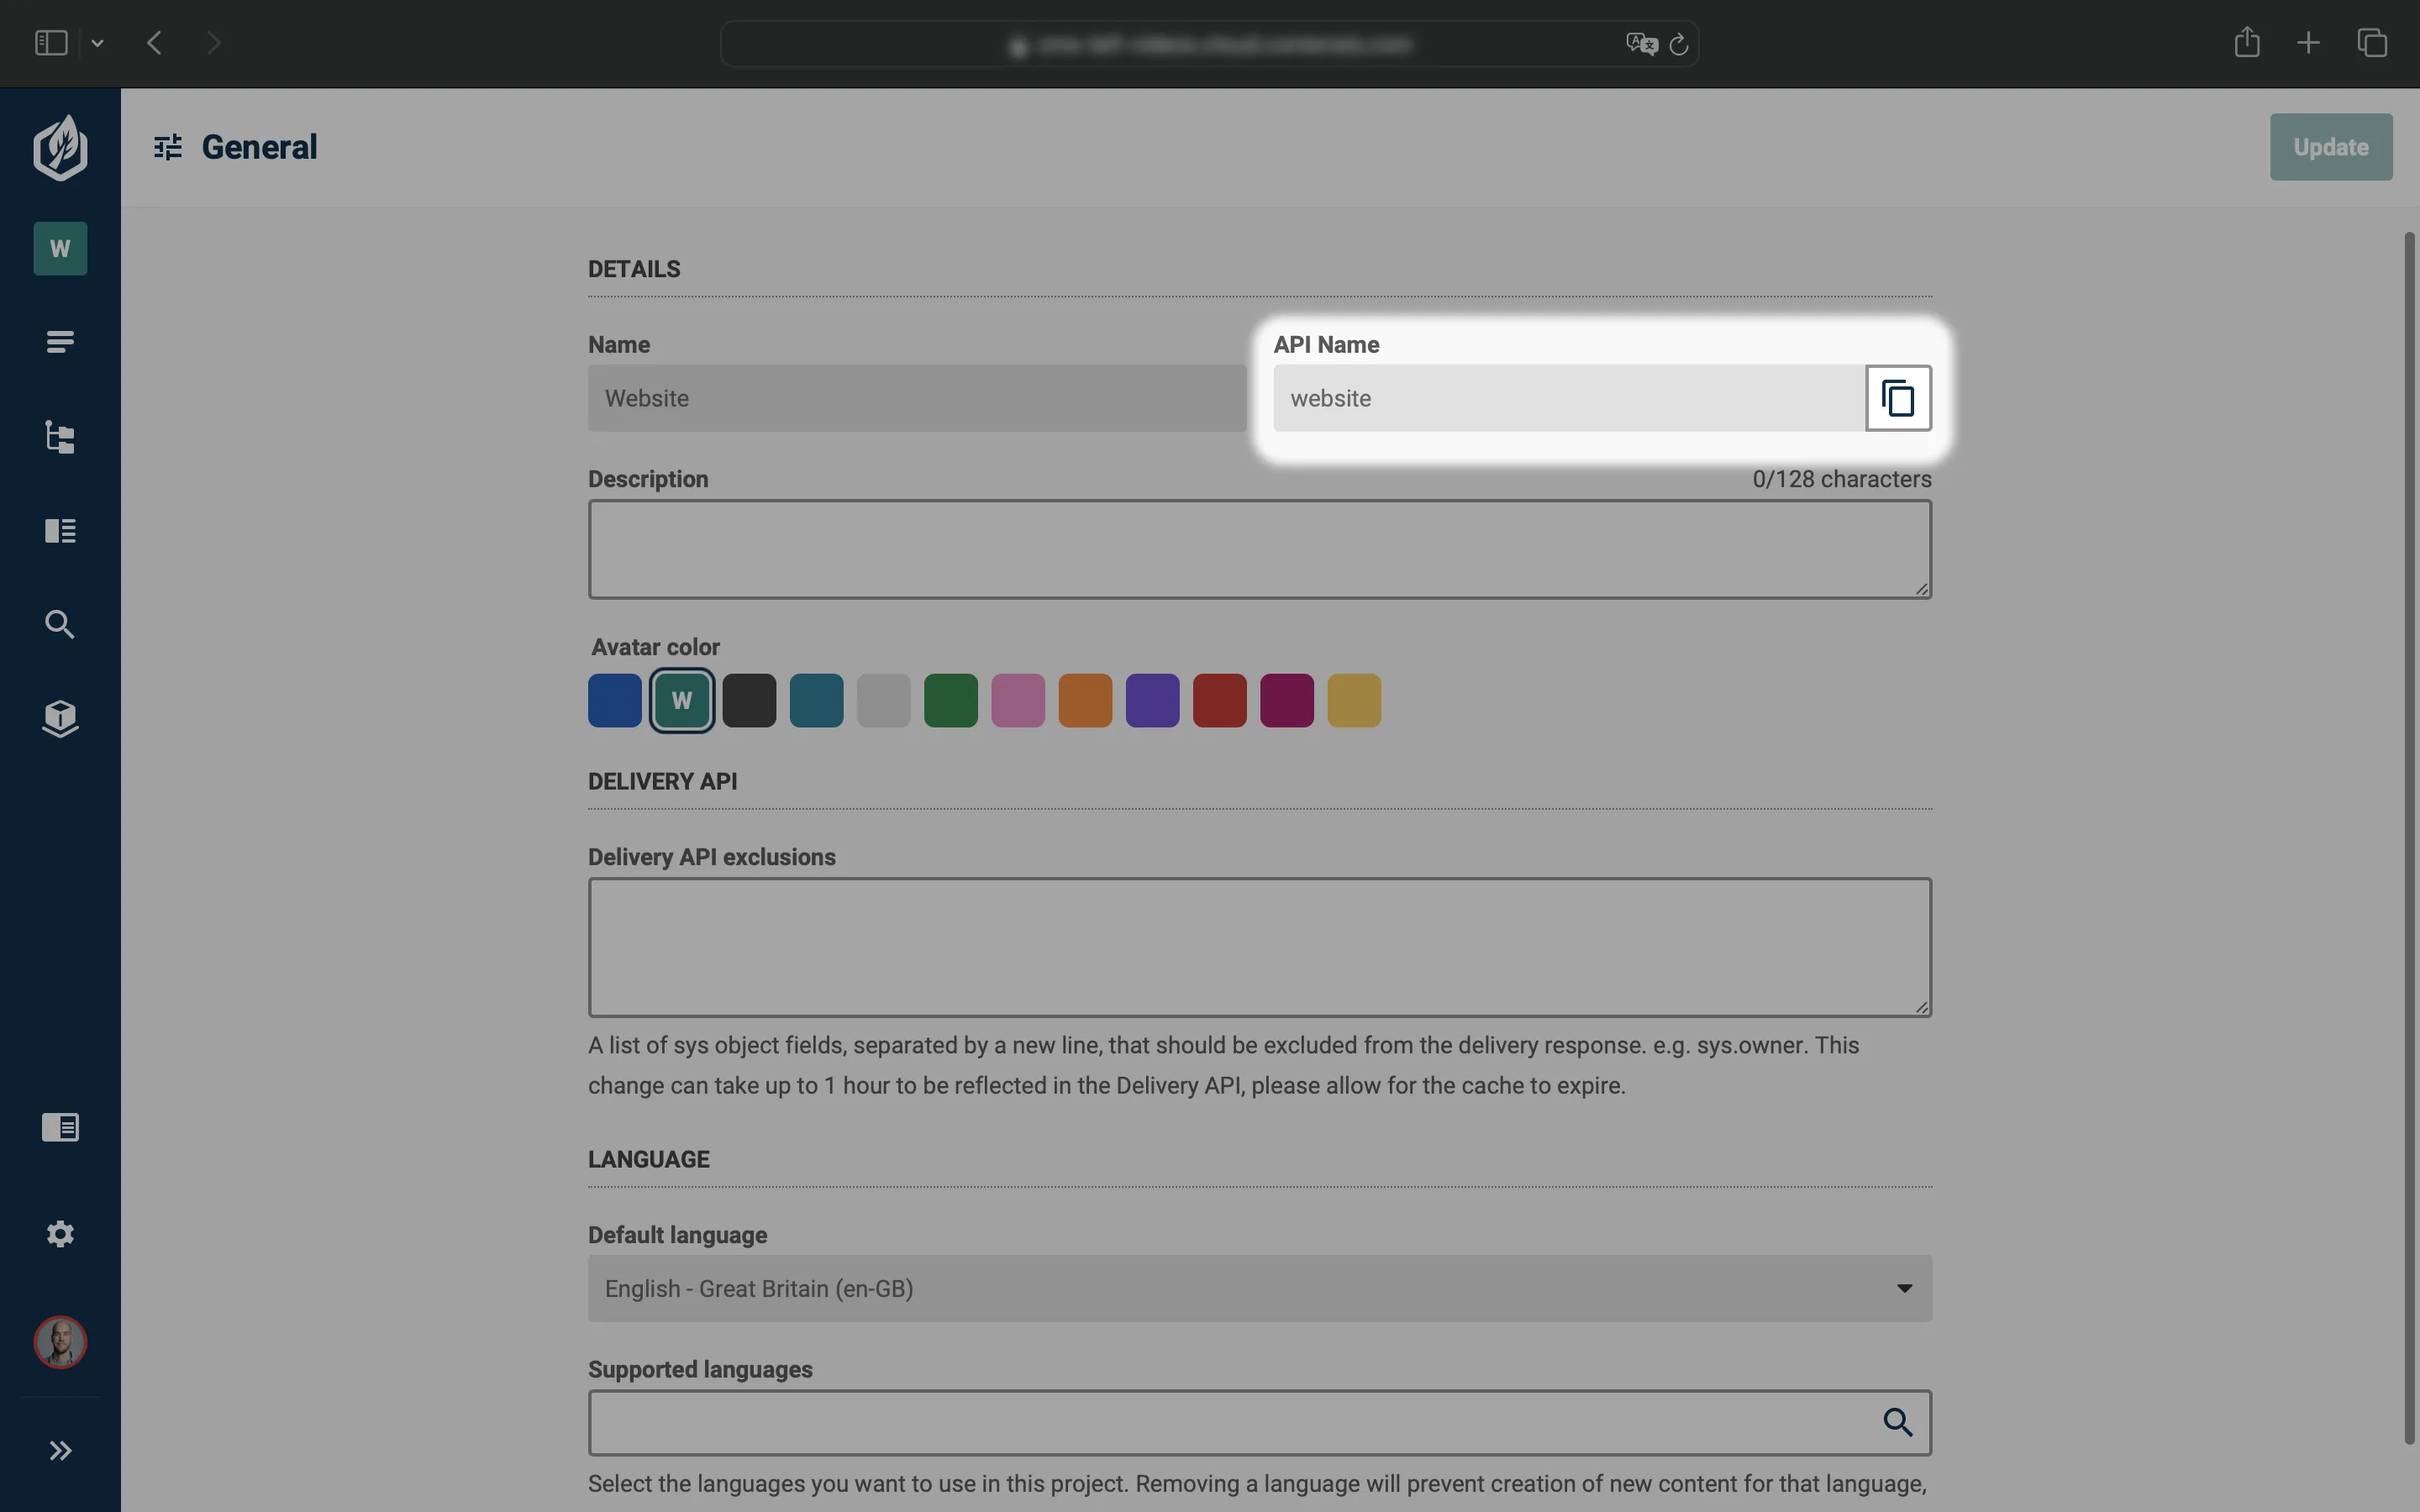
1. Locate your PROJECT_API_ID by navigating to Settings > General – look for the API Name section to find the unique identifier.
2. Next, determine your ALIAS by examining your CMS URL, for instance, cms-leif.cloud.contensis.com. Extract the part that follows cms-. In this example, the ALIAS would be 'leif'.
3. Now we need to update the .env file to store our PROJECT_API_ID and ALIAS. Copy the following code snippet and paste it underneath your client secret in the .env file. Ensure you update the placeholders in the snippet to match your own PROJECT_API_ID and ALIAS:
PROJECT_API_ID= {yourProjectId}

ALIAS= {yourAlias}
Setting up API key roles and permissions 🤝
Now that we've created our API key, we need to assign it to a role so we can grant it permission to create and publish entries. Follow the steps below to set up your role.
- First, navigate to your CMS and go to Settings > Roles.
- Press New role.
- Give your role a meaningful and descriptive name. It's also good practice to add a description to help you or your team members remember what your role is for, but it's not essential for this demo.
- We now need to assign the API key we created in the previous step to this role. With the role open, press the API keys tab. Use the search box to find the API key you created earlier and press it to adding it to the role.
- Press Save to confirm your changes.
- In order for our API key to create and publish entries, we need to add some permissions to this new role. With the role open for editing, go to the Permissions tab. Select Entries from the toolbox on the left.
- Enable the
CreateandSave / Publishoptions in the Basic Workflow section of the Permissions panel on the right of the screen. - Press Save to apply the configured permissions.
Allow Content Type creation permissions 🔐
This next step adds a touch of quirkiness to our process.
Navigate to the Settings > Users in your CMS. Here, find the user that shares the same name as the API key we have just created.
- Open the user profile
- Click into the
Groupstab - Assign the
Content Type Administratorsgroup to the User.
Nice! We are now able to create Content Types.
Creating our first Content Type 🎨
Open your created project in your favourite IDE.
First, we want to define our Content Type schema:
const newBookContentType = {
  id: 'book',
  projectId: 'website',
  name: { 'en-GB': 'Book 📕' },
  description: {
    'en-GB': 'Use this content type to store information about books.',
  },
  entryTitleField: 'title',
  entryDescriptionField: 'blurb',
  fields: [
    {
      id: 'title',
      name: { 'en-GB': 'Title' },
      dataType: 'string',
    },
    {
      id: 'blurb',
      name: {
        'en-GB': 'Blurb',
      },
      dataType: 'string',
      editor: {
        id: 'multiline',
      },
    },
  ],
  defaultLanguage: 'en-GB',
  supportedLanguages: ['en-GB'],
  workflowId: 'contensisEntryBasic',
  dataFormat: 'entry',
};
Now that we have created our Content Type schema, we're all set to create our first Content Type:
client.contentTypes.create(newBookContentType)
  .then(result => {
    console.log('API call result: ', result);
  })
  .catch(error => {
    console.error('API call fetch error: ', error);
  });
We can now execute our code by typing node index.js into the termial.
Once the code executes, keep an eye out for the response to be logged to the console; this indicates the successful creation of our Content Type. To confirm, navigate to our CMS and search for 'Book 📕', from here we can Publish our Content Type - Voila!
Creating our first Entry 📝
Let's remove our Content Type schema and creation code and replace it with our Entry schema, you can use the snippet below or create your own.
const newBookEntry = {
  title: 'How Not to Kill Your Houseplant',
  blurb:
    "Your guide to every stage of plant parenting for beginners, from identifying exactly what's in the pot, to helping it flourish and grow! If you wonder what the crispy bits at the leaf edges are, why the stalks are looking spindly, or why your plant looks brown even though you've watered it, How Not to Kill Your Houseplant will explain - and fix - your horticultural woes. Understand how much light, water, heat, and humidity your plant needs with quick tips on what your houseplant does and doesn't like. Learn to spot the danger signs and how to rescue an unhealthy plant, and follow easy advice to pick the top plants for your bathroom, cold rooms, desk, and windowsill to create your own indoor oasis.",
  sys: {
    contentTypeId: 'book',
    projectId: 'website',
    language: 'en-GB',
    dataFormat: 'entry',
  },
};
Now that we've got our Entry schema, we can create our very first Entry with client.entries.create().
client.entries
  .create(newBookEntry)
  .then((result) => {
    console.log('API call result: ', result);
  })
  .catch((error) => {
    console.log('API call fetch error: ', error);
  });
We can now execute our code by typing node index.js into the terminal.
Once the code executes, keep an eye out for the response to be logged to the console; this indicates the successful creation of our Entry. To confirm, navigate to our CMS and search for 'How Not to Kill Your Houseplant', from here we can Publish our Entry - Voila!